Pro Guide: How To Mix Your Songs Online in 10 Steps
In this article, we go over the steps to mix your songs online using Soundtrap’s easy-to-use DAW. No downloads needed, and everything in your project is stored online.
The basics of audio mixing
A song is made up of different sounds. In music production, these sound sources are referred to as tracks or stems. When producing a song, your project is likely made up of several instrumental tracks, like drums, bass, keys, etc.
You may have a sample that loops over your drum track, a common practice in Hip Hop and Electronic music. Most songs also have vocal tracks: lyrics performed by a singer or a rapper. Mixing is simply the process of making sure all of these tracks, or stems, sound good in unison.
You’ve probably heard a song where the snare drum is so loud that it hurts your ears or a bass line that is so heavy that you can barely hear the lyrics. These are signs of poor mixing. The purpose of mixing is to make sure that every instrument and vocal finds its own space within the song and doesn’t get drowned out by one another.
To accomplish this, you need to learn how sound frequencies work. Each sound has its own prominent space on the frequency spectrum. Bass sounds, like a kick drum or a bass guitar, have low frequencies, most notably around 50-200 Hz. A hi-hat or a flute, on the other hand, exists mainly at the high end of the spectrum, around 2000 - 5000 Hz. Depending on a singer’s gender, vocals usually sit in the middle to high-end, 200-2000 Hz.
When mixing a song, you should try to separate all these sounds into their own spaces. So, when played together, the song fills up the whole frequency spectrum without drowning anything out.
If you want to learn how to mix vocals, we recommend reading this blog post on how to mix professional vocals online.
Mixing and editing music online
Mixing music online is an increasingly popular way to make songs sound professional without expensive audio software or taking up space on your computer. Many websites offer free online mixing and mastering and it can be challenging to know which one is best suited for you.
Soundtrap is an online audio software that lets you create, record, mix, and master songs from start to finish. It offers a wide selection of mixing plugins and effects to edit and shape every sound to your liking.
Your project is available and stored online, so you don’t have to worry about downloading any software or transferring large files between devices. You can even invite other people to collaborate on your mix. Just log in to your account from any device and start working on your project instantly.
How to edit audio and add mixing effects to your tracks in Soundtrap
Ten steps to mixing music online with Soundtrap
1. Organize your tracks
Having a good structure and organized workflow is key when mixing music. The more tracks you have in your project, the harder it is to find what you’re looking for.
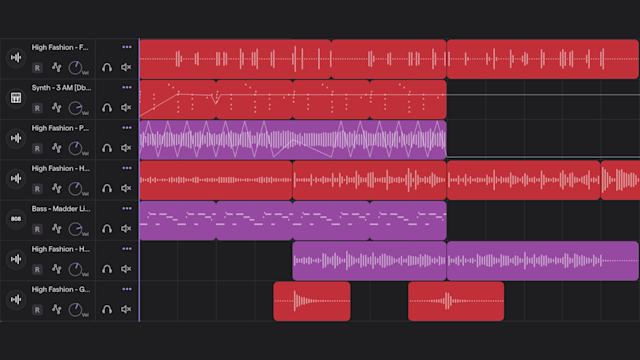
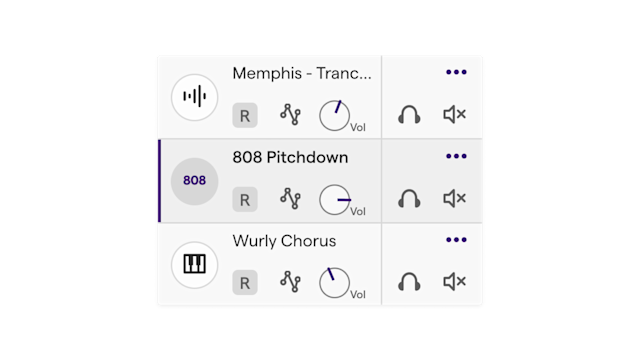
Soundtrap lets you name and color code each track in a way that makes sense to you. This makes it easier to know exactly where you need to make changes in your mix as you work on your project.
2. Edit your recordings
The whole reason behind creating music in a studio is to be able to perfect it. Playing instruments and singing live is rarely done with perfection, but in the studio, you have the opportunity to edit your takes.
Go over each recording and edit out the imperfections. It could be a noise from touching the mic stand, loud breaths when recording vocals, or you may even hear fingers picking chords on a bass guitar. Any noise that you don’t want to be part of the song should be edited out.
Another recommendation is to fade in and out at the beginning and end of each take. This gives a smoother listening experience between takes.
3. Adjust volume levels
The most important rule about volume mixing is no clipping. Clipping causes distortion and is not pleasant to listen to. To prevent this, listen to each track separately and make sure that nothing is distorting. Next, listen to all your tracks simultaneously and tweak the volume knobs until everything sounds good in unison.
4. Use automation to make it interesting
Automation in Soundtrap is a feature that lets you automatically adjust the volume, panning, and EQ throughout the track. You may want the vocals to be a little louder during the hook – Volume Automation takes care of this with just a quick setting.
Maybe you want your cymbals to move from right to left during a section of the song – simply adjust the Panning Automation. Using the Sweep Automation in Soundtrap, your song intro can have just the low ends playing, to make it sound muffled. Automate the Sweep on the instrument to progressively start playing the full sound when the song kicks off.
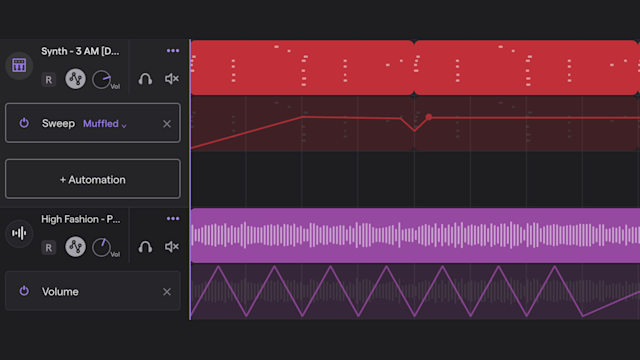
Soundtrap's Automation allows you to change the sound of a track over time.
Get started with Soundtrap today!
5. EQ out the excess
This is where the fun begins and the mixing starts to really improve the sound. Remember that we mentioned the frequency spectrum of sound earlier? An EQ – or Equalizer – lets you turn down or increase the volume of specific frequencies.
Let’s say you have a bass guitar recorded, but you want it to sound darker. Using an EQ to turn down the higher frequencies will let you do just that.
The same thing applies to any instrument or vocals. Remember, you want to carve out space for each track. Take out the lower end of your vocals to not muddy up the mix when it clashes with the bass sounds. You may want to lower the mid frequencies of a piano to create more space for the vocals to stand out.
You can also increase the frequency of any instrument or vocal with an EQ. Turning up the high-end of your vocals will usually make them sparkle more and stick out from the rest of the mix. Be careful though, you don’t want your vocals to sound too harsh or they might annoy the listener.
Read more about EQ:ing in Soundtrap in this support article.
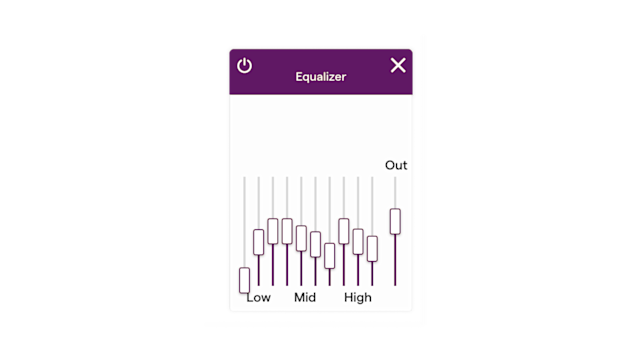
6. Compression to control dynamics
You’ve probably experienced watching TV at night, trying not to disturb anyone. The dialogue in the movie is too quiet for you to hear so you turn up the volume a little. Then all of the sudden, a really dramatic action scene happens in the movie.
The explosions, screams, and thematic music are so loud that you think you’re going to wake up the entire neighborhood, so you quickly have to turn down the volume again. This sudden change in volume occurs in music as well, and the solution to fix it is called a compressor.
A compressor automatically levels out the dynamics of a sound. Take a horn instrument, like a saxophone, for example. A saxophone has a wide dynamic range that can sound very quiet, as well as very loud, depending on how you play it.
A compressor turns up the volume during the quiet parts and decreases the volume during the loud parts. This way, you get a leveled and controlled volume of your saxophone throughout the whole song. The same applies to drums, keys, vocals, and so on.
7. Panning to create a stereo experience
If all music was played in mono, on just one speaker, it wouldn’t be very exciting. The stereo field is what makes music come alive and sound enticing. With Soundtrap’s panning function, you can pan instruments and vocals to each side of the stereo field.
Put your piano keys slightly to the left while panning the lead guitar to the right. Maybe your hi-hat travels from left to right with panning automation during the chorus. A nice trick for background vocals is to have one vocal panned hard to the right and another take hard to the left.
These mixing techniques will bring excitement to your song and keep your listeners from losing interest.
There are some ground rules, however. Your bass, kick drum, snare drum, and lead vocal should always sit in the middle of the stereo field. Other than that, you are free to let your creativity run wild!
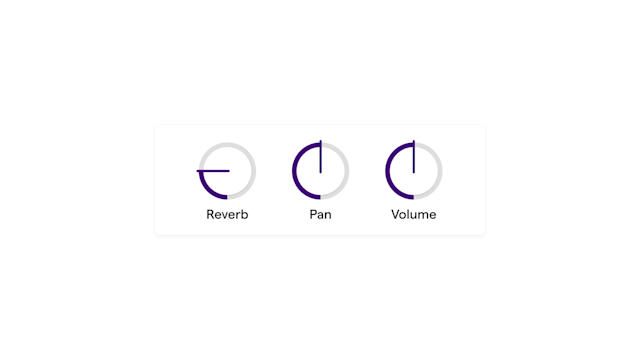
Panning in Soundtrap allows you to position sounds from left to right.
8. Create space for your music
If you listen carefully to music performed live, you’ll notice that the sound is affected by the space it’s performed in. A big area concert will have a certain sound, while a band rehearsing in a studio will have another.
The human ear expects music to live in some kind of physical space. It’s what makes it sound natural – and alive. Digital music created on a computer will not have this natural factor to it, for obvious reasons. That’s where Reverb comes into play.
The reverb effect provides any sound with an artificial physical space. You can make drums sound like they’re being performed in a cathedral, or vocals sound like they’re being sung in a hallway. Without reverb on instruments and tracks, a song can sound lifeless and dull.

The Reverb plugin in Soundtrap let's you choose different Room settings.
9. Add effects to make it stand out
There are endless possibilities when it comes to using effects. The purpose is to create something original and interesting. Soundtrap offers a wide selection of effect plugins to use on your tracks to give them a professional and polished sound.
We’re not going to go over every effect here, but make sure to try a few of them out in your mix. See if you can create something that sounds like nothing else out there. That should be your objective.
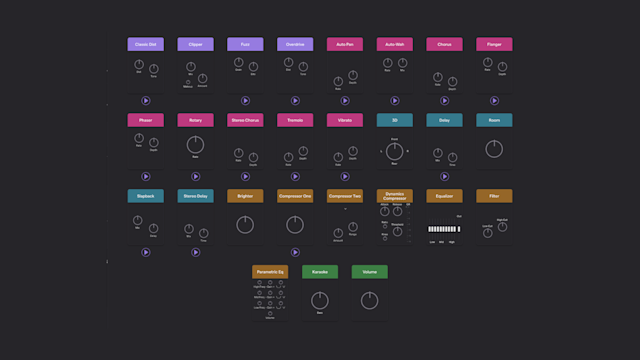
Soundtrap offers a wide selection of mixing and effect tools.
10. Referencing your mix to other songs
Few audio engineers make a song, mix it, and then release it to the world right away. Your ears are delicate and listening fatigue is a real thing. After you finish your mix, take a day or two to rest your ears. Once you’re back in the studio, you’ll be able to judge your mix more objectively.
Another important aspect of mixing is to compare your mix to other songs that you like. What’s the vibe of your song? Is it happy or sad? What kind of instruments are used? Is it Rap or Country? Find a similar song on Spotify and compare your mix to it. Figure out what tweaks you should make to get the sound as close as possible to your reference track.
Another tip is to listen to your mix on different sound systems. Luckily, Soundtrap lets you carry your studio with you, so you can open up the project on your phone or laptop, wherever you are. Listen in your car, on headphones, in a large room, and on Bluetooth speakers. Take notes of improvements and go back to editing.
After a few revisions, you should be ready to take your mix to the final stage of production – mastering.
Read more on Mixing
Mixing a Song Online in 10 Easy Steps
An Introduction to Auto-Tune: How It Can Enhance Your Music
Pro Guide: How to Edit & Mix Your Vocals Online in 7 Steps
8 important mixing tools & effects every musician needs
Mixing Tips for Beginners With Noize London | Creator Tutorial
Breakdown of EQ Mixing: Parametric vs. Visual vs. Graphic Equalizers
What Is Distortion in Music and How To Use It When Mixing
Create Better Mixes: Reverb in Music Explained
Create Better Mixes: Saturation in Music Explained
Create Better Mixes: Delay in Music Explained
Create Better Mixes: Compression in Music Explained
Create Better Mixes: Sidechain Compression Explained
What Is Audio Sibilance and How Do You Fix It With a De-Esser?
Try Soundtrap today! Your all-in-one DAW for music production on the go.
