Mic Placement For Vocals: Recording Tips & Techniques
December 12, 2024 - Master mic placement for vocals with tips on positioning, angles, and techniques to capture clear, professional-quality recordings every time.

When it comes to capturing the best possible vocal performance, microphone placement is one of the crucial factors that can make all the difference.
The microphone's position affects the sound quality and can either enhance or hinder the clarity of your vocal recording.
For optimal recording balance, place the microphone 6 to 12 inches from the singer’s mouth. This distance helps ensure clarity without overwhelming the mic with plosives or breath sounds.
Experimenting with different angles and distances can help you find the sweet spot unique to the artist’s voice. Slightly tilting the mic can reduce harshness or emphasize warmth, catering to personal preferences and song style.
Use the setup to suit your environment and the type of vocal character you're after.
Whether recording in a professional studio or your bedroom, trying various positions can lead to discovering what makes the artist’s voice shine. With attention to detail and some experimentation, you’re set on the path to creating stand-out recordings.
Before discussing mic placement for vocals in detail, we need to review some microphone fundamentals, as they all affect the placement options.
Understanding Mic Types and Polar Patterns
Choosing the right microphone and polar pattern is crucial for capturing clear vocals. This involves understanding the differences between microphone types and how polar patterns impact sound pickup.
Dynamic vs. Condenser Microphones
Dynamic and condenser microphones are your main options when selecting a microphone for vocals.
Dynamic microphones are known for durability and high sound pressure tolerance, making them ideal for live performances. They often have a cardioid pattern, which effectively rejects background noise.
Condenser microphones offer greater sensitivity and a wider frequency response, which makes them superb for studio recordings. These microphones, often provided by phantom power, require external power and are ideal for capturing the nuances of a vocal performance.
Ribbon Microphones
If you're looking for a warm and natural sound, there is a third, not quite as common, mic type: a ribbon microphone. They are more delicate and typically used in controlled studio environments.
Ribbon mics come in passive and active models, and active ribbon mics need phantom power, just like condenser mics.
Polar Pattern Basics
Polar patterns refer to the directionality of how microphones pick up sound.
Cardioid
The cardioid pattern is most commonly used for vocals because it captures sound in front of the mic while minimizing noise from the sides and rear. This is especially beneficial for isolating your voice from other instruments or background noise.
Omnidirectional
Omnidirectional microphones capture sound equally from all directions, which can be useful for recording ambiance or ensembles but might not be ideal for isolating vocals.
Understanding the polar patterns helps effectively choose the area you want to capture and provides insights on microphone placement that caters to your recording or performance needs.
Setting Up Your Vocal Mic
Positioning your vocal mic correctly and utilizing acoustic treatment can significantly improve your recording quality. These elements are crucial to ensure you capture the best sound possible, whether in a home studio or professional vocal booth.
Mic Position for Optimal Sound

Position the microphone between 6-12 inches away from your mouth. This distance helps capture clear vocals while reducing unwanted room noise and plosive sounds. A pop filter is recommended to minimize plosives like "p" and "b" sounds.
Check the height of the mic relative to the singer’s mouth. Aligning it at mouth level or slightly above can enhance clarity and tone. Experiment with angles, as sometimes tilting the mic slightly can improve sound capture.
The Role of Acoustic Treatment
Acoustic treatment helps reduce reflections and echoes in your recording space. This might mean adding foam panels or blankets to walls in a home studio. Even small changes, like closing curtains or strategically placing furniture, can positively impact sound quality.
Professional vocal booths typically include advanced acoustic treatment. However, creating a similar environment at home can be effective. Limiting hard surfaces minimizes room reflections that can muddy the vocal sound.
DIY acoustic treatment often requires trial and error. Fine-tuning can involve simple actions like rearranging the room or adding a rug to improve the acoustics.
I've even done quick recording sessions in a hotel room where I used two mic stands to hang a duvet directly behind the singer. It didn't look pretty, but it got the job done, and the vocal takes came out great.
Technical Considerations
Understanding technical aspects like phantom power and frequency response is essential when selecting and positioning a microphone for vocals. These factors play a critical role in capturing high-quality sound.
Phantom Power and Mic Choice
Some mic types require phantom power. This 48V power supply is often delivered through an XLR cable and is necessary for large-diaphragm condenser microphones, which are popular for vocal recordings due to their sensitivity and accuracy.
Choosing the right microphone can significantly impact production quality. Large-diaphragm condenser microphones provide a warm and rich tone with excellent detail, and they’re most likely your best bet for capturing great vocals in a studio environment.
Dynamic microphones are typically better for live performances where durability and feedback rejection are important.
Remember to check that your audio interface or preamp can supply phantom power if you’re using a condenser mic.
Frequency Response and Sound Source
Frequency response refers to how a microphone reacts to different frequencies. This characteristic shapes the captured sound and is particularly crucial for vocal recording. A flat response is typically ideal, capturing the voice without altering its natural tone.
Microphones can also color the sound by accentuating certain frequencies. For vocal recording, look for microphones designed for recording vocals; they are designed to handle the range of human voice frequencies (roughly 80 Hz to 15 kHz).
Positioning affects how sound waves interact with the microphone; experiment with angles and distances to manage the proximity effect and capture the best tonal quality.
Practical Mic Placement Techniques
Now that we've covered the fundamentals, we can finally get into more details on placement techniques.
Mic placement plays a crucial role in the delicate art of capturing vocals. You'll need to adapt your approach based on the recording space and the specific qualities of the singer's voice, making sure you capture the vocals with clarity and emotion.
Recording Vocals in Different Environments
Your mic placement strategy depends on the recording environment.
In a studio environment, position the microphone about 6 to 12 inches from the singer. This distance helps maintain clarity without overemphasizing sibilance or breathing.
Live performances present different challenges, like background noise and bleed from other instruments. Place the mic closer—about 2 to 6 inches from the singer's mouth to reduce pickup from surrounding sounds.
To enhance the quality of the vocal track, minimize any sound reflections using sound-absorbing panels. If you can't control the room itself, movable panels can help you isolate the vocalist enough to still capture a great recording.
Adjusting for Vocal Range and Technique
Every singer's voice is unique, requiring tailored mic placement techniques.
Placing the mic slightly off-center for singers with a strong mid-range can prevent overpowering the recording. If a singer is known for powerful high notes, adjusting the mic angle slightly away from direct exposure can help manage those intense moments without distortion.
You can also experiment with the proximity effect, which occurs when a mic is placed close to the sound source. It increases bass response and adds warmth to vocals with a thinner quality.
Another trick I often use in the studio is encouraging singers to turn their heads slightly on powerful notes to control dynamics.
Flexibility and experimentation are key to achieving the best sound for each recording session.
Enhancing Vocal Quality and Reducing Noise
Using Pop Shields and Shock Mounts
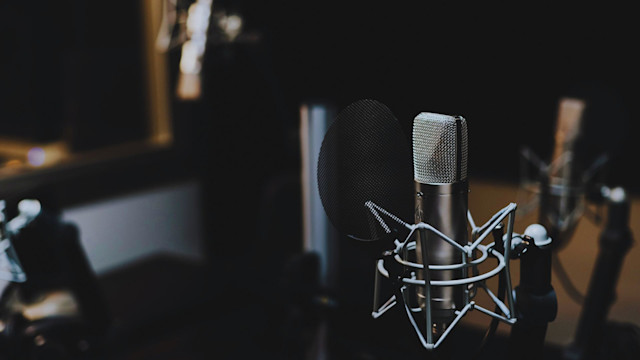
Pop shields are invaluable tools in vocal recording. A pop shield is a screen placed between the singer and the microphone to reduce the popping sounds and audio sibilance produced by the expulsion of air during certain consonants, like 'p' and 'b.'
By diffusing sharp air bursts, pop shields help maintain a clean sound.
Shock mounts are another vital piece of gear. They help eliminate unwanted vibrations that can travel through microphone stands, such as footsteps or desk movements.
A shock mount suspends the microphone in a flexible cradle, dampening these noises and allowing for a clearer recording.
Combining these tools creates a more professional sound by reducing both sharp plosive noises and subtle vibrations that interfere with the main vocals.
Minimizing Room Sound and Background Noise
The environment in which you record directly impacts vocal quality. We already talked about acoustic treatment and how soft furnishings or specialized acoustic panels can reduce ambient room sounds and echoes.
To further minimize background noise, record in a quiet room, turn off noisy appliances, and close windows and doors to block external sounds.
Another great tip I have if you’re working in a home studio with a hard floor: Make sure the singer is standing on a rug or blanket to reduce foot noise and echo. You'd be surprised how much of a difference this can make!
Conclusion
Your microphone choice and placement are the first steps toward capturing a great vocal performance.
Focusing on the microphone's position—such as keeping it 6 to 12 inches from the vocalist's mouth—and experimenting with angles will help you find the best position for your unique sound.
Tools like pop shields and shock mounts can also make a big difference, reducing unwanted noise and improving vocal clarity.
It is important to adapt your setup based on the environment, whether it's a well-treated room or a live performance stage.
The most natural sound comes from a balance of proper mic technique, careful placement, and using the right microphone type for the vocalist.
Experimentation is key, whether recording in a bedroom studio or a professional vocal booth. With the right preparation and attention to detail, you’re well on your way to achieving the perfect vocal take every time.
About the author
Tero Potila is a professional music composer and producer. His career combining knowledge and experience from music, TV, film, ad, and game industries gives him a unique perspective that he shares through posts on teropotila.com.
Get started with Soundtrap today!